Life Scraps
Image and video hosting by TinyPic
Showing posts with label Photography. Show all posts

Thursday, January 28, 2010

CoffeeShop


This is why I love reading other blogs! While skimming through some old posts at SuzyQ Scraps' blog I came across her entry about ACTIONS. Actions (for those who don't know) are these awesome shortcuts to edit your photos in Photoshop Elements.
Suzy mentioned a website (blog) called The Coffee Shop. I am really tired right now so I will let you link on over to the site and read about these SAHM's and how awesome they are for creating these FREE actions for people like me (and you)!!! Yes, I said free. I love FREE!!!

Here is a before and after of a photo of my nephew, Trevor. I will explain what I did.

(BEFORE)

All I did to the (straight out of the camera) photo above was red eye reduction & brightened it up just a bit using the Levels Adjustment Layer.


(AFTER)

I ran two different actions on this photo to get it to this point.

First....I ran the Baby Powder Room action which allowed me to soften up his face and removed the blotchiness. This action also allowed me to brighten & whiten his eyes to make them pop more.

Second....I ran the Hot Cocoa 2 action that gives this warm, soft glowing effect. Oh, I just love the result!

Of course, you know I did a layout using the final product! This was for a Scrap Orchard Template Challenge. I used several kits....Sweet Teddy & Caber MacGregor by Amy Stoffel as well as Composure by TaylorMade Designs.

Monday, November 9, 2009

New Kit TBA on Thursday!!!

But, in the meantime you can see all its' gorgeousness in some layouts I did. Come back Thursday to see where you can grab this lovely kit :)

Here it is as it was intended to be....a Christmas kit. This is Trevvy last Christmas. I have a feeling I know what kit I will be using to make my Cmas cards this year ;-)

And here I am showing the versatility of the kit by doing an Autumn layout with it. Another photo of Caiden playing in the fall leaves at Nana & Papa's house! To make the photo blend better with the colors in the kit I did the following:

1. I duplicated my photo and on the top layer I cut Caiden out of the photo.

2. Next, on the same top layer I blurred it and turned it a sepia tone.

3. Now, what was left was the bottom layer of Caiden showing thru in its' original color and the surrounding leaves are blurred and sepia toned. This is a new technique I just happened to teach myself recently....I LOVE IT!!!

Monday, October 19, 2009

Cherohala Skyway Drive Layout Post #1

Slowly I am getting some layouts created from the trip Mom and I took through Tennessee & North Carolina last week. Trying to find my mojo again.....ugh, I don't like creative dry spells. Enjoy the 3 I have so far...explanations under each layout.


A few of the scenic views we had driving through both the Cherokee & Nantahala National Forests as well as alongside the Ocoee River. Kits used to create this were: Outside The Lines by Taylormade Designs; Dreams of Summer by Amy Stoffel


An old barn, as if you couldn't tell. I saw so many old, delapidated barns on this trip but was never really able to stop and photograph any of them. It is hard when you are driving 55+ mph and then suddenly see one.....not like you can throw on your brakes, flip a U-ee and get the shot. Not to mention....many of them were not really accessible without driving onto someone's property to get the picture and I am not going to trespass just to get a photo of a barn.


This was a beautiful water full about 6 miles off the Cherohala Skyway just outside of Tellico Plains, TN. You never have to leave your car if you don't want to.

Wednesday, August 12, 2009

Torn between love & desire....

If you know me, you know I adore the mountains! Always have and I think I always will. The last 2 years I have made trips to Colorado but sadly this year it was not in the cards. My only time to get a week away is in October and well, I don't do Colorado from Oct-May ;-) So, I am putting together an ocean vacation with my mom for October this year. She has always wanted to see Savannah, GA and I am going to make sure she does! I have never had much of a desire to do ocean trips but I am really getting pumped about this one! I have reservations made at a little cottage on Tybee Island....just a few short minutes to the Atlantic Ocean. I can't wait to drive around Savannah and see the gorgeous personality of Southern living!

Here is my first love....a beautiful sunset behind the Rocky Mountains, courtesy of my BFF in Colorado.....


And a photo, courtesy of a search on the internet & Trip Advisor, of a sunRISE over the Atlantic Ocean....what I think will become a new love affair of the heart!


Ahhhhhhhhh, counting the days to October 10th!!!!!!!!!!!!!!!!!


Love & Hugs,
Helen

Sunday, July 26, 2009

38 Hours In Kentucky

But oh, what a great 38 hours it was. We arrived around 6:00 pm Friday night to find a cozy little cottage, overflowing with nick-nacks galore. We departed Sunday morning around 8:00 a.m. to head back to reality of life at home.

The trip consisted of lots and lots of driving. We drove through Amish country and took a scenic drive through Land Between The Lakes (area between Kentucky Lake & Lake Barkley). This took up the biggest part of the whole day on Saturday, which was more than I had anticipated but it was worth it. It just meant I didn't accomplish my scrapbooking goals nearly as I had hoped. Out of 4 layouts I set out to have done before we came home, 1 was finished and I practically redid it when I arrived home. Oh well, tomorrow night is another chance, right? I hope atleast.

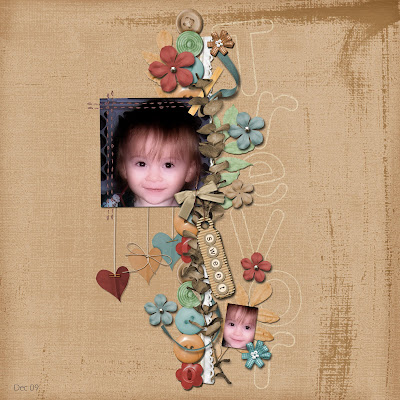
Here are a few photos & a LO I did from our short, 38 hours in Kentucky....
Not a bad set up for just $100 per night, huh?
The leaning....shoot, I can't remember what these things are called, senior moment!!
I so love this photo of mom & I....especially after cropping off my butt, LOL!
My room.....it was the "red hat ladies" room....see the red & purple boa's up on the window??
Mom's room....she got an a/c unit...a 2 water features in her room....and a double bed. After all, this was a trip for her birthday :)
A 6 week old foal the owner's had on their property. Her (or his...not sure, didn't look) name is Buttermilk. So stinkin' cute!
Caught this photo of Momma & baby walking away....sometimes the shutter click happens at the right moment!
Pond & gazebo on the property....the horses are to the right in this photo.
Our first morning...enjoying our coffee before we head out for the day. It was a semi-cool, breezy morning which we soon learned was a prelude to some thunder showers that were heading our way.
This photo is just called "Three Chairs" Our cottage is there in the background behind the greenery.
Mom & I posing by Kentuck Lake. Taken on a short, scenic drive before we entered what was called The Trace, which is a 20 mile (one way) drive thru Land Between The Lakes.
Such a funny story behind this photo. One of the reasons I wanted to do the LBL drive was because they sport an Elk & Bison Prairie. A 3 mile one-way drive thru a patch of land where they keep elk & bison. You pay $5 per vehicle. You are allowed to drive thru as many times as you desire....as long as you pay the $5 each time. Okay, so I make sure my camera is turned on and ready for lots of photo op's. We drive, and drive, and drive, and drive......no stinkin' elk or bison. Mom and I were going "Here elky, elky, elky....here bison, bison, bison". I said "you know, they are all back in the trees sitting there laughing at us goin' 'look at those idiots. they paid $5 to drive thru this....let's hide and see if they pay another $5 to go thru again'." Right at the very end of the drive there was 1 sad, lazy, lone bison lying next to a watering hole. He picked up his head long enough for me to snap some photos and that was the extent of The Elk & Bison Prairie.
If you had not guessed, this is just a photo of an old, delapidated barn.
Kinda a funny story to this one, too. On our way home we had mapped out a different, more scenic route to take. It was a pretty drive out of Marion along 91 North. We saw more Amish homesteads and even saw one Amish family walking to church. Then lo & behold if 91 didn't end at the Ohio River. We had 2 choices....wait for the ferry to come back & take us over or turn around, back track all the way we just came and go back the way we came in originally. Ugh, neither of us were thrilled about driving up on a ferry. I was down right nervous about it. But, the thought of all that back-tracking was not appealing either. Soon some other vehicles drove up and were waiting for the ferry. We said to each other "well, if they are willing to brave it, so can we....let's live dangerously and go for it." It was less than 5 minutes over the river and we were so happy we didn't chicken out because it saved us a lot of time. I love how the water sparkles in this photo!
Here is a shot I took while driving out 654 South through the Amish homesteads of Crittenden County, KY. Mom actually saw this shot and so I stopped in the road to get the shot. The photo does not do justice to the beauty that you could see for miles. I did a layout using this photo, see the next & final photo/layout......
I did alot of adjusting & blending of this photo to reach this look. I did some levels adjusting & then colorized to make it a sepia tinted photo & brought back the blue of the sky. I then added a digital TTV texture effect around the edges of the photo as well added a brown paper grungy texture with a lighter opacity. The quote I used under the photo was one I thought up just for this shot.
Well, that is just a few of the photos from the weekend getaway to Marion, KY. It was fun and I highly recommend The Honeysuckle Cottage for your stay.

Tuesday, July 14, 2009

Sweet Tuesday....

It is a few past 7 a.m. on Tuesday. I have been up since 5:30 thanks to a nice little headache. It has since faded, leaving me looking forward to this day. Yes, you heard me....looking forward, not dreading. Okay, okay...I confess...I took a vacation day, LOL. A whole day this time. Yes, I just had a holiday but trust me, this is a much needed day off. And, I did about 2 days worth of work yesterday to prepare.

After posting this I am going to put my face on, brush my teeth and head out the door but first, I must make my list....
  • Starbucks...need a non-fat, no-whip mocha & blueberry scone...well, maybe need is too strong a word....I WANT :)
  • Wal-Mart...inexpensive blue towels; kids sunglasses; beach toys; 8x8 scrapbook refill pages
  • Hobby Lobby...black ink pads (on sale, 50% off, sweet!)

For now, that is all I can think of. I am preparing for a huge women's event at my church, to take place this Friday night. As part of my "duties" I volunteered to do 2 themed tables. One will be a scrapbook/craft theme of which I should have the majority of what I need to decorate the table down in my scrapbook room. The other table will be, if you hadn't guessed it, a beach theme. I want the blue towels to place of the tables to represent the ocean. I could use some new towels anyway so I wouldn't be making a totally frivelous purchase since I will be able to use them when this is over....if I find the right blue that will look good on the table but also work in with my bathroom decor. Hmmm, this should be a challenge.

Well, I have played enough for this morning.....here is a LO I created while the sun rose. As I have said previously, I am taking an online, FREE, photo editing workshop over at Jessica Sprague's site and I am learning some awesome techniques!!! Today's technique is about "burning edges" on your photos to give a more dramatic look to your photo. I really love this technique which is a few steps in length to achieve but so worth it. I like it better than the lighting effect feature I stumbled across in my PSE program recently because it gives a more subtle look that I feel I can control more. In the LO below, I burnt the edges of the photo around Trev's face by creating a separate adjustment layer (levels) over the original photo, dialing down the center slider tab to darken the entire photo, then I chose my gradient tool and changed it to a radial shape in the tool bar, changed the mode to multiply and executed the gradient over my photo. For added emphasis I then clicked on the "white" mask tool within that adjustment layer and "brushed" over Trev's face to highlight as much as possible since I want the focus to be on that gorgeous face of his! Once I had it the way I wanted it I saved it as a JPG and then put it into my workspace to begin the layout design process (adding papers, elements & journaling). Once I placed the photo in my workspace I decided to go back to my photo and do one more b&w adjustment layer and added that b&w into my workspace as well. I love the contrast of the color & the black/white photos. For all you "non digi-scrapping" folks out there this was probably just a bunch of crazy talk. And finally, no more waiting....here is the LO. I also added the "before" photo to show you the difference with this technique I used.

Thursday, June 11, 2009

Like Photography? Like Free?

Then you will LOVE this......

I love Jessica Sprague's blog!! She is offering a FREE photo editing class in July! If you are like me and you want to learn all you can about your PSE or PS program and how to get really cool looking photos but don't want to spend tons of $$ then register for this FREE class!!!